Timeline speed graph
With Timeline Overlay on, every chunk is drawn on the Timeline, and you can reshape it by dragging instead of typing numbers.
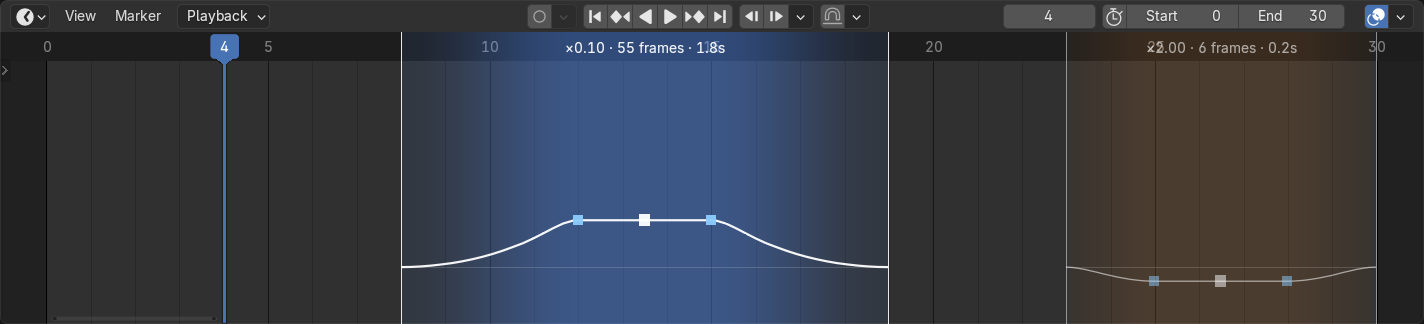
- Tint band: blue where time is slowed, orange where it is sped up. The bigger the change, the stronger the tint; the active chunk is drawn brighter.
- Speed line: the chunk’s speed profile, on a log scale from 0.001x at the top to 10x at the bottom. A faint line marks 1x, and 0.1x sits at mid-height.
- Label: “x speed · N frames · S s” for each chunk, or a note when it lies outside the render range.
| Grab | Drag to | Notes |
|---|---|---|
| Left or right edge | Move the chunk’s Start or End | Snaps to whole frames; works in every Dope Sheet mode |
| White grip on the speed line | Change the speed: up is slower | 0.001x to 10x, three decimals |
| Light-blue knees at the plateau ends | Change Ease In / Ease Out | Grabbable even at ease 0 |
Release applies the change; Esc or right-click while dragging cancels it and restores the old values. The speed grip and knees work in the Timeline view; in other Dope Sheet modes only the edges are draggable. A click that misses every chunk passes through, so scrubbing still works.
Shortcuts (hover the Timeline or Dope Sheet):
- U then drag across frames: creates a new chunk, copying the last chunk’s speed and eases.
- Shift+U: turns the scene’s preview range into a chunk (set a preview range with P first).
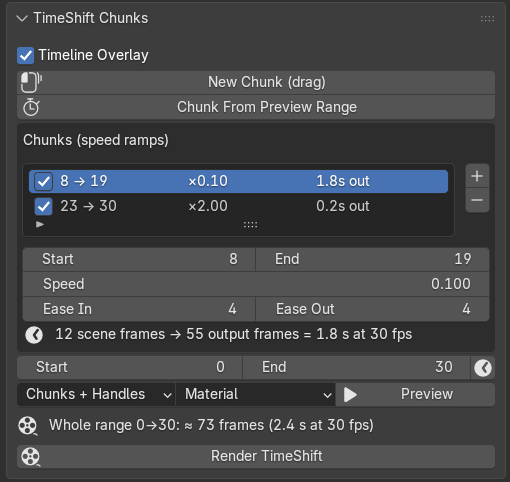
Rebind them under Preferences > Keymap > Dopesheet Generic.