TimeShift documentation
Version 2.11.1 · Blender 4.2 and newer · Cycles and EEVEE
Getting started
Overview
TimeShift renders true sub-frame slow motion in Blender without rescaling your timeline. Instead of stretching keyframes, it renders the in-between times Blender normally skips, such as frame 24.25, 24.5 and 24.75, and writes them out as one continuous image sequence.
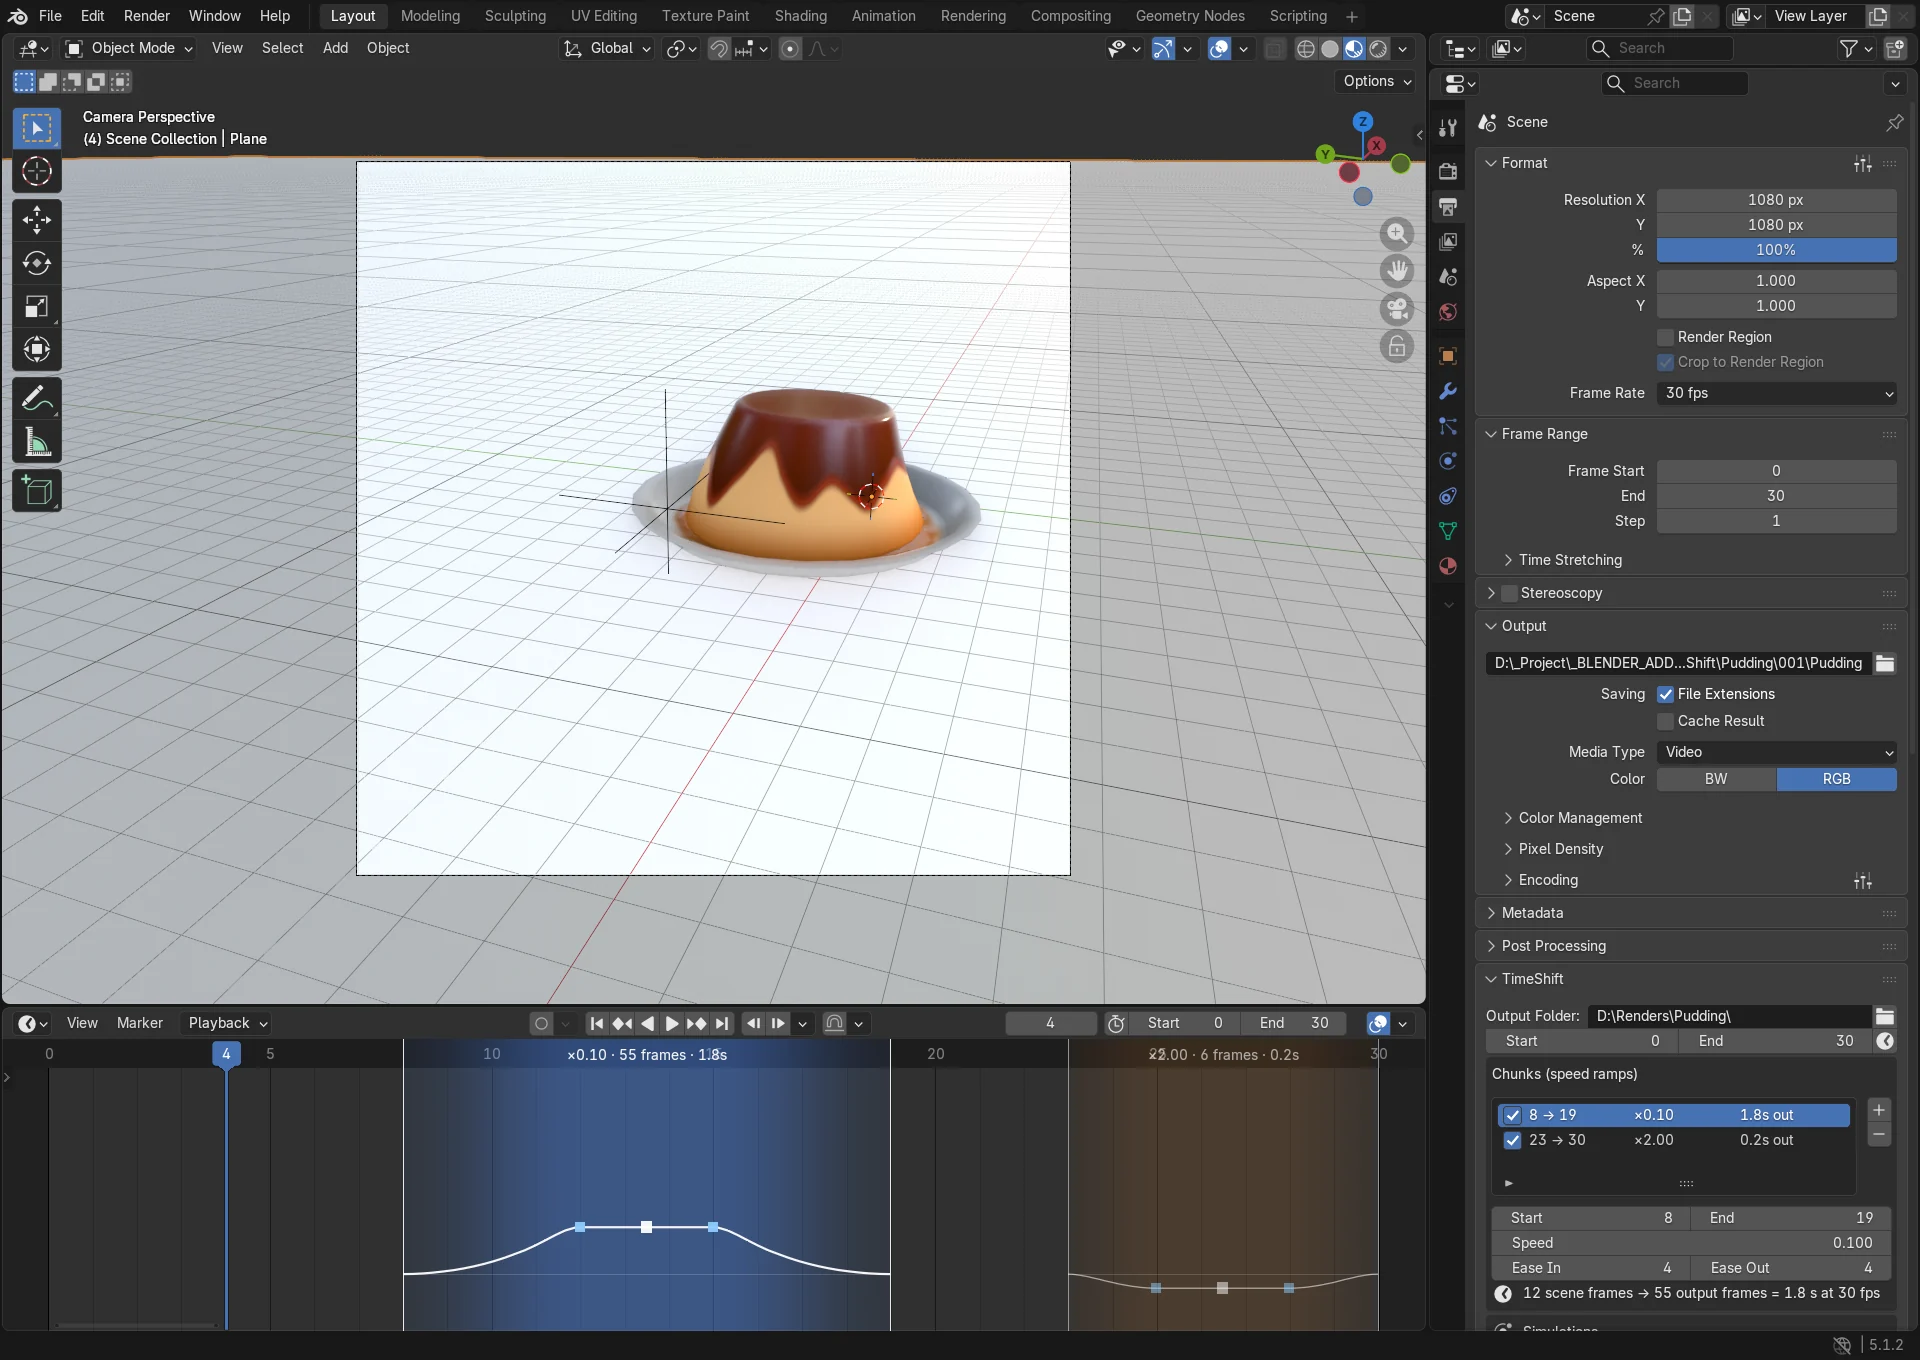
- You mark one or more chunks of the timeline and give each a speed. A speed of 0.25 renders four output frames per scene frame (4x slow motion); 2.0 renders every other frame (2x fast forward).
- Your keyframes, NLA strips, drivers, camera markers and simulation caches are never moved or edited.
- When a render finishes or is cancelled, TimeShift restores every render setting it changed.
Sub-frame motion is exact for anything Blender evaluates as a function of time: keyframes, drivers, Geometry Nodes and shaders. Physics caches (rigid body, cloth, soft body, particles, hair, dynamic paint) are interpolated from their bake, so bake them first. Mantaflow fluid, smoke and fire hold whole frames.
Getting started
Installation
TimeShift needs Blender 4.2 or newer and installs as a Blender extension.
- Download
timeshift-<version>-extension.zipand keep it zipped. - In Blender, open Edit > Preferences > Get Extensions.
- Open the dropdown at the top right, choose Install from Disk… and pick the zip. Dragging the zip onto the Blender window also works.
- Check that TimeShift is enabled in the list.
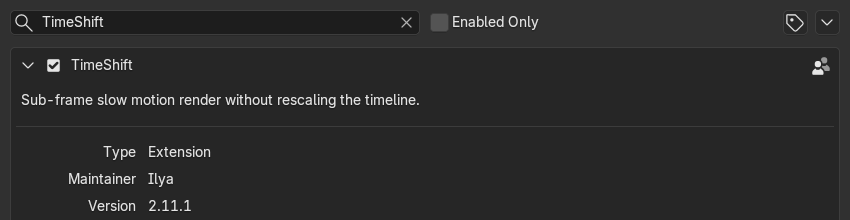
Blender shows one permission during install: TimeShift writes rendered frames to the output folder you choose. To update, install the new zip the same way; it replaces the old version. Restart Blender if a panel does not refresh.
Prefer the classic route? Preferences > Add-ons > dropdown > Install from Disk… installs it as a legacy add-on.
Once enabled, TimeShift appears in three places:
| Where | What it holds |
|---|---|
| Properties > Output > TimeShift | The full panel: range, chunks, simulations, outputs, options, preview and render. Collapsed by default. |
| 3D Viewport > Sidebar (N) > TimeShift | A compact panel: chunks, range, preview and render. |
| Timeline / Dope Sheet > Sidebar (N) > TimeShift | The same compact panel, plus drag-to-create chunks. |
Getting started
Quick start
A first slow-motion render takes six steps, all in Properties > Output > TimeShift.
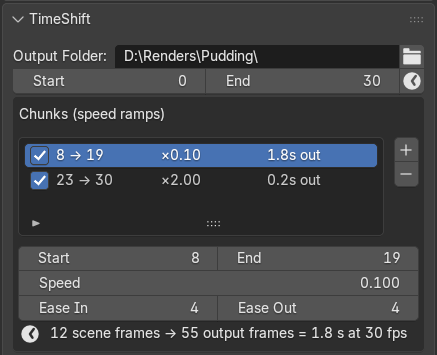
- Pick an output folder. TimeShift writes its own image sequence there and leaves your scene’s own output path as it was. The default, //timeshift/, sits next to your saved .blend.
- Set the render range. Type a start and end, or click the clock button to copy the Timeline’s range.
- Add a chunk. Click + in the Chunks list, then set Start and End to the moment you want slowed, Speed to 0.25 (4x slower) and Ease In / Ease Out to a few frames. In the Timeline you can instead press U and drag across the moment.
- Bake simulations. If the scene has physics, click Bake All Dynamics so caches interpolate between frames.
- Preview. Choose a Shading mode (Material is a good default) and click Preview TimeShift to check the timing in seconds.
- Render. Click Render TimeShift. The line above the button shows how many frames and seconds the result will run.

Import the finished sequence into your editor at the scene’s frame rate: slowed moments now play back slower, everything else at normal speed.
Using TimeShift
The TimeShift panels
TimeShift has one full panel and two compact ones. All three edit the same settings, which are stored per scene in your .blend.
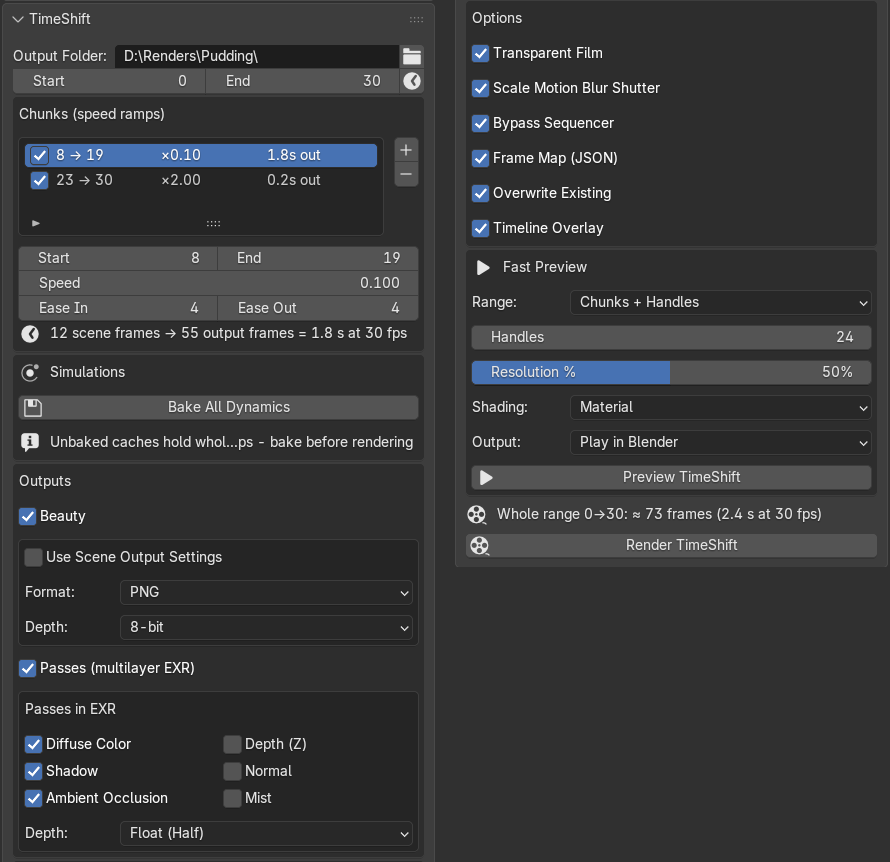
Properties > Output > TimeShift is the full panel. From top to bottom:
- Output Folder and the render range: Start, End, and a clock button that copies the Timeline’s preview range (or the scene range when no preview range is set).
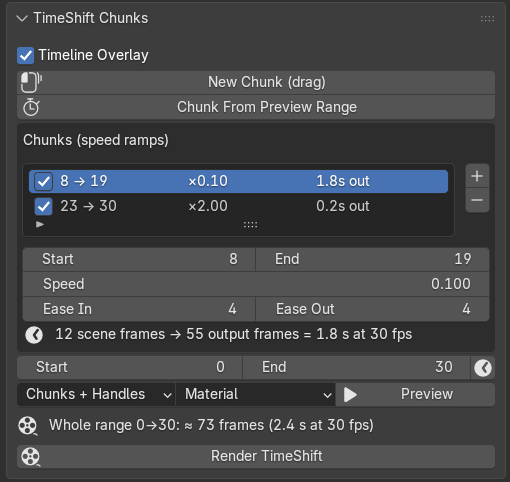
- Chunks (speed ramps): the chunk list with + and -, and the active chunk’s Start, End, Speed, Ease In and Ease Out.
- Simulations: Bake All Dynamics.
- Outputs: Beauty and Passes (multilayer EXR), with their formats.
- Options: Transparent Film, Scale Motion Blur Shutter, Bypass Sequencer, Frame Map (JSON), Overwrite Existing, Timeline Overlay.
- Fast Preview: range, resolution, shading, output and the Preview TimeShift button.
- Footer: the output-length estimate, any setup warnings, and Render TimeShift.
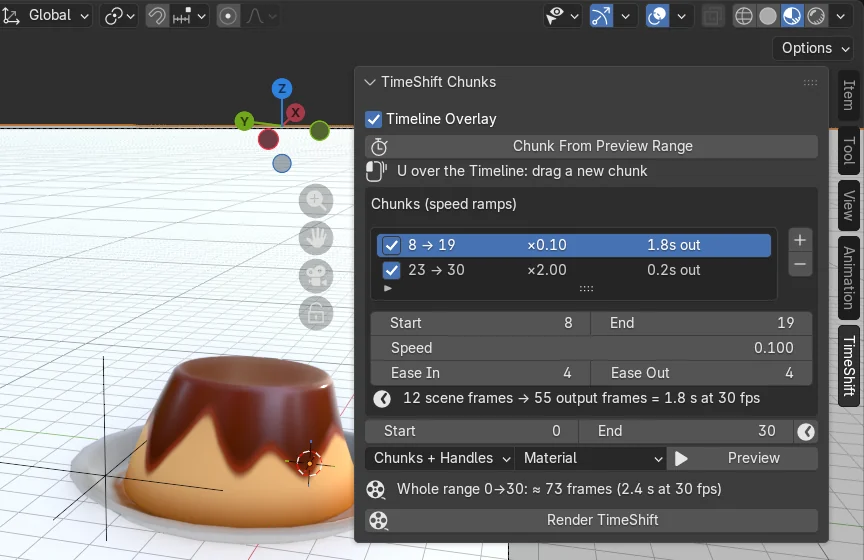
TimeShift Chunks sits in the TimeShift tab of the 3D Viewport sidebar and the Timeline / Dope Sheet sidebar. It holds the Timeline Overlay toggle, Chunk From Preview Range, the chunk list, the render range, a one-row preview (Range, Shading, Preview) and the footer. The Timeline version adds New Chunk (drag); the 3D Viewport version reminds you that U over the Timeline does the same. Output formats, options, baking and the full preview settings live only in the full panel.
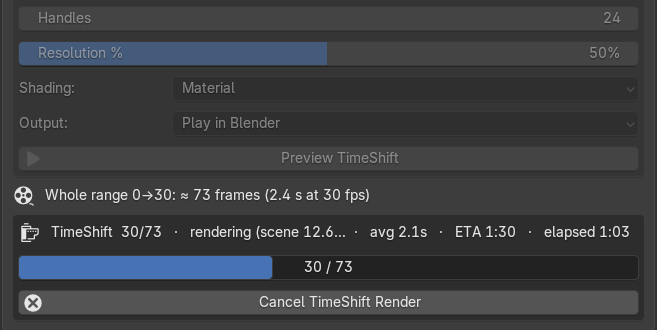
While a render runs, the settings grey out because they are frozen at the start. The footer then shows progress, last and average frame time, elapsed time and an ETA, plus Cancel TimeShift Render.
Using TimeShift
Chunks and speed ramps
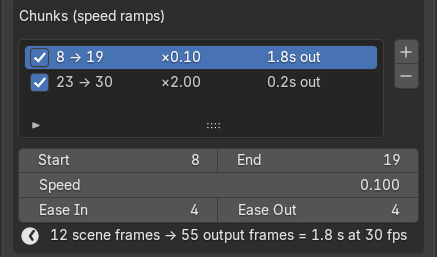
A chunk is a range of scene frames with its own speed. Everything outside your chunks renders at normal speed, one output frame per scene frame.
| Field | What it does | Default |
|---|---|---|
| Enabled (checkbox) | Includes the chunk in the render | On |
| Start / End | First and last scene frame of the chunk | 1 / 10 |
| Speed | 0.5 = half speed (2x the frames), 0.1 = 10x slow motion, 2.0 = 2x fast forward. Allowed range 0.001 to 10. | 0.5 |
| Ease In | Scene frames spent ramping from normal speed into the chunk’s speed; 0 = hard cut | 5 |
| Ease Out | Scene frames spent ramping back to normal speed; 0 = hard cut | 5 |
Ramps follow a smooth S-curve, and where the two ramps overlap, the one closer to normal speed wins. A chunk shorter than Ease In plus Ease Out therefore never reaches its full speed, and TimeShift warns you.
- Adding: + creates a chunk right after the last one (the first chunk starts at the current frame). It runs 10 frames and copies the last chunk’s speed and eases.
- Reading the list: each row shows the range, the speed and how many seconds of output it makes. Under the active chunk, a line spells it out: N scene frames → M output frames = S s at F fps.
- Length: inside a chunk, output frames are roughly scene frames divided by speed, so 20 frames at 0.1 make about 200. The footer shows the total for the whole range; a render is capped at 500,000 output frames.
- Overlaps: when two chunks overlap, the one that starts earlier wins, and TimeShift warns. A chunk outside the render range has no effect.
Using TimeShift
Timeline speed graph
With Timeline Overlay on, every chunk is drawn on the Timeline, and you can reshape it by dragging instead of typing numbers.
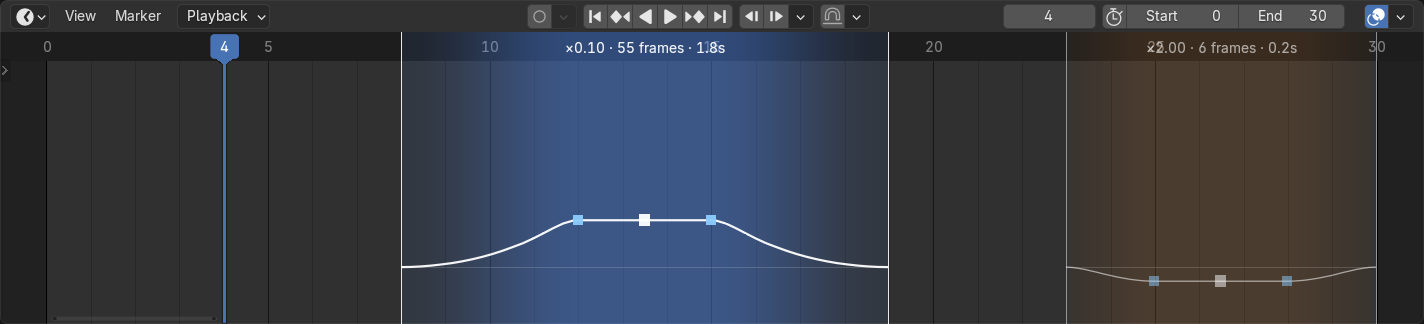
- Tint band: blue where time is slowed, orange where it is sped up. The bigger the change, the stronger the tint; the active chunk is drawn brighter.
- Speed line: the chunk’s speed profile, on a log scale from 0.001x at the top to 10x at the bottom. A faint line marks 1x, and 0.1x sits at mid-height.
- Label: “x speed · N frames · S s” for each chunk, or a note when it lies outside the render range.
| Grab | Drag to | Notes |
|---|---|---|
| Left or right edge | Move the chunk’s Start or End | Snaps to whole frames; works in every Dope Sheet mode |
| White grip on the speed line | Change the speed: up is slower | 0.001x to 10x, three decimals |
| Light-blue knees at the plateau ends | Change Ease In / Ease Out | Grabbable even at ease 0 |
Release applies the change; Esc or right-click while dragging cancels it and restores the old values. The speed grip and knees work in the Timeline view; in other Dope Sheet modes only the edges are draggable. A click that misses every chunk passes through, so scrubbing still works.
Shortcuts (hover the Timeline or Dope Sheet):
- U then drag across frames: creates a new chunk, copying the last chunk’s speed and eases.
- Shift+U: turns the scene’s preview range into a chunk (set a preview range with P first).
Rebind them under Preferences > Keymap > Dopesheet Generic.
Using TimeShift
Simulations
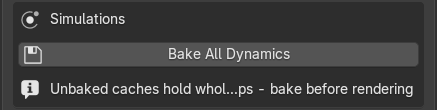
Bake your physics before a TimeShift render: a baked cache interpolates smoothly between frames, while an unbaked one jumps from whole frame to whole frame.
Bake All Dynamics (Simulations box) bakes rigid body, cloth, soft body, particles, hair dynamics and dynamic paint in one click. It needs an open 3D Viewport. Hair-dynamics caches are baked one by one, because Blender’s own Bake All skips them. When you start a render, TimeShift also warns you if the scene contains simulations.
| Motion | At sub-frames | Bake needed |
|---|---|---|
| Keyframes, NLA, drivers | Exact: evaluated at the true sub-frame | No |
| Procedural Geometry Nodes, shader and texture animation | Exact, when driven by the frame | No |
| Rigid body, cloth, soft body, particles, dynamic paint | Interpolated from the baked cache | Yes |
| Hair dynamics | Interpolated from the baked cache | Yes; Bake All Dynamics covers it |
| Mantaflow liquid, smoke and fire | Holds whole frames, so it steps | Baking does not help |
| Imported OpenVDB volume sequences | Holds whole frames | Not applicable |
Two habits keep caches clean: make sure each cache’s frame range covers your whole render range, and bake again after you change a simulation.
Using TimeShift
Fast preview
Preview TimeShift plays your retimed motion in seconds by rendering through the viewport instead of the full engine. Use it to judge speeds and ramps before committing to a long render. Press Esc to stop it.
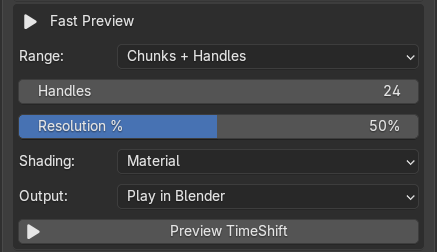
| Setting | Options | Default |
|---|---|---|
| Range | Chunks + Handles (your chunks plus normal-speed padding), Whole Range, Custom start/end | Chunks + Handles |
| Handles | Normal-speed frames added before and after the chunks | 24 |
| Resolution % | 10 to 100 percent of the final size | 50 |
| Shading | Material (EEVEE material preview), Solid (fastest), Rendered (scene engine, slower), Viewport (leave as is) | Material |
| Output | Play in Blender, Save MP4, Save Frames | Play in Blender |
The preview needs an open Blender window, a 3D Viewport and a scene camera. It renders through the first 3D Viewport it finds, switching it to camera view with overlays hidden, then restores your shading, view and overlays afterwards. Compositor effects such as glare are part of the full render, so treat the preview as a timing and look check.
Where preview files go: %TEMP%\timeshift_preview\<scene name>\, as preview_00000.png and up, plus preview.mp4 when you choose Save MP4. Save MP4 and Save Frames open that folder when done. The folder is wiped at the start of every preview and is separate from your output folder, so copy anything you want to keep. The MP4 uses Blender’s built-in encoder (H.264), so no external tools are needed.
Using TimeShift
Rendering and outputs
Render TimeShift renders every output frame as a still, then restores your settings. Blender stays responsive while it runs; press Esc or Cancel TimeShift Render to stop after the frame in progress.
Everything lands in the Output Folder (default //timeshift/, next to your saved .blend; an unsaved file needs an absolute folder):
| File | Contents | Turned on by |
|---|---|---|
beauty/beauty_00000.png and up |
The final image, exactly as a normal render produces it, including your view transform and compositor | Beauty |
passes/passes_00000.exr and up |
One multilayer EXR per frame with the chosen passes, linear | Passes (multilayer EXR) |
frame_map.json |
The scene time and speed behind every output frame, written before the first frame | Frame Map (JSON) |
Files are numbered by output frame from 00000, not by scene frame. Beauty and Passes are both on by default.
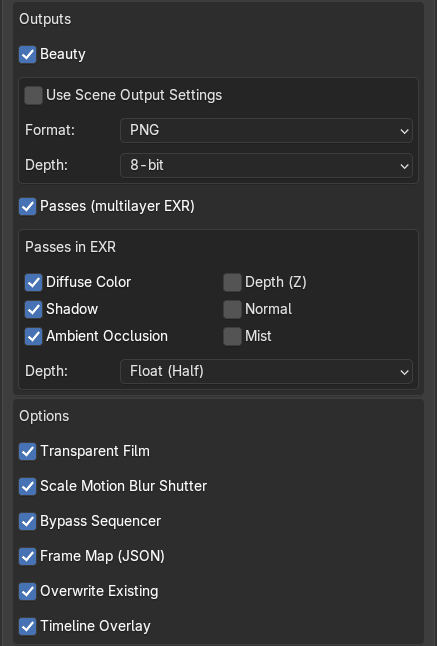
Beauty format: PNG, JPEG (no alpha, Quality 90 by default), single-layer OpenEXR or TIFF, at 8, 16 or 32-bit where the format allows. Or tick Use Scene Output Settings to use your scene’s own format, depth, colour mode and compression.
EXR passes: Diffuse Color, Shadow and Ambient Occlusion are on by default; Depth (Z), Normal and Mist are off. EXR Depth is Float (Half), enough for EEVEE; choose Float (Full) for precise Z and Normal data with Cycles.
| Option | Default | What it does |
|---|---|---|
| Transparent Film | On | Renders the background transparent; turn it off to keep your world |
| Scale Motion Blur Shutter | On | Multiplies the shutter by the local speed so blur matches the slowed motion (needs Motion Blur on) |
| Bypass Sequencer | On | Ignores Video Sequencer strips, which only know whole frames; restored afterwards |
| Frame Map (JSON) | On | Writes frame_map.json |
| Overwrite Existing | On | Turn off to skip frames already on disk and resume an interrupted render |
| Timeline Overlay | On | Draws chunks and the speed graph on the Timeline |
With Cycles, Persistent Data is switched on for the run to speed it up, then restored. Rendering needs an open Blender window; command-line rendering (blender -b) is not supported.
Help
Tips and best practices
- Dial timing fast, then check the look. Preview with Solid shading at 50% to set speeds, then switch to Material for a look check.
- Always ease. A few frames of ease-in and ease-out make a ramp feel filmed rather than switched. A chunk shorter than its ease-in plus ease-out never reaches full speed, and TimeShift warns you.
- Turn on Motion Blur. Scale Motion Blur Shutter is on by default, so the shutter follows the local speed: blur shrinks as time slows, the way a real high-speed camera behaves, and grows back as speed returns. Without it, slowed frames carry normal-speed blur and smear.
- Read the estimate before you render. Output length grows with slowdown: 20 scene frames at 0.1 become 200 rendered frames, and render time grows with them.
- One output folder per shot. TimeShift never deletes files, so a shorter re-render into the same folder leaves the old extra frames behind. Clear the folder or use a new one.
- Export the frame map for sound and editing. It records which scene time every output frame shows, so you can sync audio or match the retimed sequence back to the original.
- Bake once, then iterate freely. Speeds, eases and chunks can change without rebaking; only a changed simulation needs a new bake.
Help
Troubleshooting
Most problems show up as a message in the panel or when you press Render; each one names its fix.

| Message or symptom | Fix |
|---|---|
| “Save the .blend first or choose an absolute output folder” | The default //timeshift/ is relative to the .blend. Save the file, or pick an absolute folder. |
| “The scene has no camera.” | Add a camera, or bind one to a timeline marker. |
| “TimeShift render needs an open Blender window (not background mode).” | Render from the Blender interface; command-line rendering is not supported. |
| Physics jumps between whole frames | Click Bake All Dynamics, then render again. Mantaflow fluid holds whole frames regardless. |
| “Output folder holds frames from a different range/chunk setup.” | Turn on Overwrite Existing, or choose another folder. |
| Old extra frames after a shorter re-render | TimeShift never deletes files. Clear the folder or use a new one. |
| “Chunk … is shorter than its ease-in + ease-out” | Shorten the eases or lengthen the chunk, or it never reaches full speed. |
| “Chunks … overlap; the earlier one wins per frame.” | Move the chunks apart. |
| “Setup produces 500000+ output frames” | Raise the speed or shorten the chunk. |
| “Open a 3D Viewport to preview” or “Needs an open 3D Viewport to bake” | Open any 3D Viewport; the preview and bake both need one. |
| The background is transparent | Transparent Film is on by default; turn it off to render your world. |
| Video Sequencer strips repeat whole frames | Keep Bypass Sequencer on. |
| Burned-in metadata appears in the images | Turn off Metadata > Burn Into Image in the Output properties. |
| Compositor File Output nodes keep overwriting one file | Disable those nodes and use TimeShift’s own outputs. |
| “Time Remapping is active” | Its ratio multiplies TimeShift’s speeds. Reset Output > Format > Time Remapping unless you want both. |
| Black AO pass in EEVEE | Enable Raytracing in EEVEE’s render settings. |
Help
Limitations
TimeShift’s limits come from what Blender can evaluate between frames, plus a few deliberate choices.
- Mantaflow fluid, smoke and fire hold whole frames, so they step in slow motion. Blender does not interpolate fluid caches, and Bake All Dynamics does not bake them.
- Imported per-frame volume caches (OpenVDB sequences) hold whole frames for the same reason.
- Baked physics is interpolated, not re-simulated. Between two cached frames the motion is blended, so an extreme slowdown of very fast, chaotic motion can look smoother than a true high-speed simulation.
- No command-line or render-farm mode. Rendering, previewing and baking need an open Blender window.
- Overlapping chunks do not blend; the chunk that starts earlier wins.
- The preview shows viewport shading only. Compositor effects, Transparent Film and EXR passes appear in the full render, not the preview.
- One render holds at most 500,000 output frames.